Freediving is rewarding because it asks you to move deliberately, listen to your body, and work with a buddy. Whether you are taking your first supervised session or running a regular practice with friends, the safest and most productive sessions are the ones that are planned and run with consistent checks, clear roles and conservative progression. Below I walk through the practical steps I use as an instructor and coach when conducting a freediving session with students or buddies.
Why you must plan before entering the water
A dive plan is not paperwork for its own sake. Its purpose is practical and simple: to align the team around shared goals, clarify who will do what, and agree what to do if something goes wrong. When everybody understands the plan you reduce uncertainty and make safer, faster decisions when conditions change.
Three concrete benefits of a clear plan:
- Reduces surprises: everyone knows the exit point, the expected conditions, and who is responsible for surface supervision.
- Aligns expectations: goals (static, dynamic, depth targets), session length and what progression is acceptable are agreed in advance so no one feels pushed beyond their comfort.
- Speeds decision-making: when wind, current or weather shift, the team already has pre-agreed criteria for stopping, changing the plan or activating the emergency action plan.
Quick research sources to consult before you commit to a site:
- Tide and weather forecasts (wind, swell and local tides matter more than temperature).
- Local site reports and recent logs from other divers or clubs—visibility, boat traffic, known hazards.
- Experienced local divers or instructors who know the site and seasonal quirks.
Deciding whether to go ahead is a personal responsibility. At the water’s edge, do a final mental check: am I physically well, am I comfortable with the stated goals, and can I fulfil the role I agreed to (supervisor, swimmer, timekeeper)? If your answer is anything less than a clear yes, don’t enter. The plan is only useful if every member is comfortable carrying out their responsibilities.
Pre-session check: a head-to-toe routine
Before stepping into the water perform a systematic pre-session check with your buddy. Treat it as non-negotiable; it’s a habit that prevents simple errors from becoming emergencies.
A concise head-to-toe routine:
- Mask and snorkel: fit the mask to your face without straps first; ensure the strap sits around the crown of the head and is not twisted. Snorkel must be secure and unobstructed.
- Fins: check that the foot pockets fit comfortably with the chosen socks/booties and that both fins are identical and free of cracks; stretch the straps and make sure they secure without pinching.
- Exposure suit: zipper and seals intact, suit fits without excessive squeeze; if cold is a factor, confirm the suit provides the warmth planned for.
- Weight system: verify the weight amount with your buddy and that the quick-release functions correctly. Always double-check that weights are tied off correctly when using belts or integrated systems.
- Accessories: lanyards, line clips, knife or safety cutters, whistle—confirm they are in the expected positions and working.
Run a surface buoyancy check and weight test together. You should be slightly positively buoyant at the surface with relaxed lungs: face just at or slightly below the waterline when floating face-down, able to stand easily without excessive effort. If you sink too easily or sit too high above the water, adjust weight.
Finally, review roles and signals out loud: who supervises, who times, who is responsible for surface pickup, the emergency whistle pattern, and how you will call for an assisted retrieval. Confirm the staging area, entry and exit points, and have the relevant on-shore emergency contact information written down where it can be accessed quickly.
Entering, transitions and surface swims
Follow the entry method agreed in the plan. Shore entries, boat entries and pool-edge starts require different preparations and a different focus on footing, timing and buddy proximity.
Practical tips for transitions and surface swims:
- Enter as a buddy team when conditions allow—this gives an immediate safety presence and prevents accidental separation.
- Keep surface swims short, calm and steady-paced. Swim together and pause as a group at the planned descent point to complete a final breathing check and readiness confirmation.
- When access is crowded or energetic, stage a short distance off the main flow so you are not buffeted by swimmers or boats. Maintain line-of-sight with your buddy and use a buoy if necessary to mark your location.
- If your primary exit is unusable (boat moved, sea state changed), identify and mark a contingency exit before you start. A brightly coloured float or taped rock at a visible landmark is enough to avoid confusion under stress.
Running static apnea attempts safely
Static apnea is an effective, low-equipment training method, but in-water static breath-holds must always be supervised. The typical setup is the performing diver face-down at the surface with mask and snorkel, and a supervisor at hand.
The three parts of a static attempt:
- Relaxed breathe-up: calm, controlled breathing that reduces tension and prepares the diaphragm. Avoid hyperventilating; the goal is relaxation, not forcing oxygen higher than normal.
- The motionless breath-hold: the performer remains still, conserving oxygen and watching for the urge to breathe (UTB). Remember the UTB is driven primarily by carbon dioxide rise, not low oxygen.
- Assisted surfacing and recovery: the supervisor times the attempt and assists the performer to a supported vertical position for recovery breathing as soon as the attempt ends or on any sign of trouble.
Supervisor duties include timekeeping, supporting and nudging body position to keep the airway clear, and watching for UTB warning signs: involuntary diaphragm contractions, sudden swallowing, changes in colour or behaviour, or any delayed or slow recovery breathing. Train to increase the time after the UTB in small steps rather than inflating total times abruptly—this builds resilience safely. Throughout, keep hands and attention ready to provide immediate support.
Conducting dynamic and constant-weight dives with good flow
Both dynamic (horizontal distance) and constant-weight (depth) disciplines rely on smooth technique and conservative progression. The goal is efficient movement and calm, not maximal exertion.
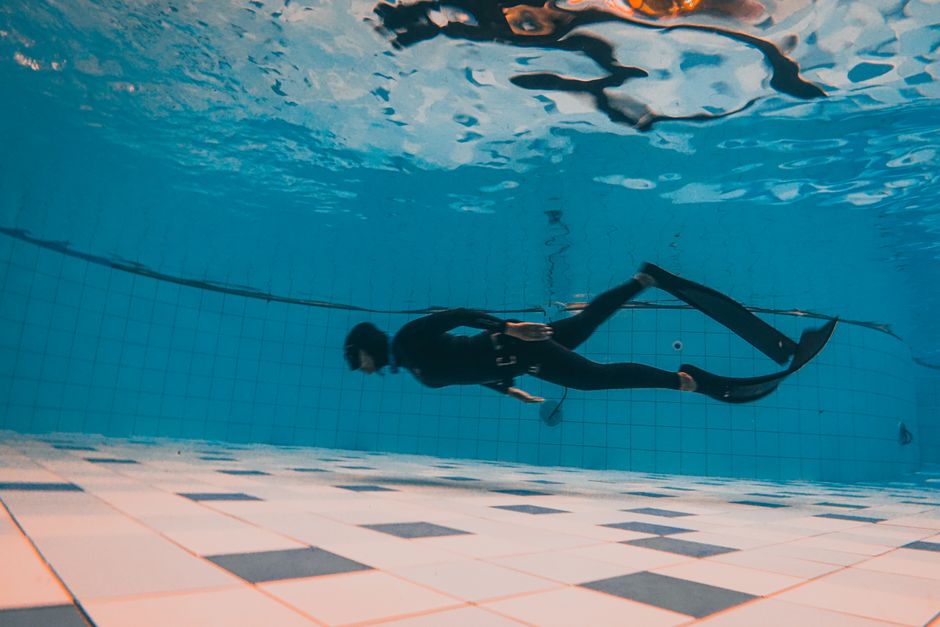
- Prioritise streamlining: head, hips and fins in one line; reduce drag by keeping a neutral spine and tight core.
- Use a sustainable, steady finning pace rather than sprinting. Efficient turns are important—practice pushing off smoothly and returning to the streamline quickly.
- The buddy follows at the surface, ready to assist at the end of the lap or at the turn area.
- Perform a careful buoyancy check and establish the correct amount of weight so you are slightly positive at the surface and can comfortable descend with a controlled duck-dive start.
- Stay within arm’s length of the line and always use a lanyard for depth work. The line is your reference and your safety; treat it respectfully.
- Equalise early and often during descent and remain relaxed on the ascent—technique often determines success more than raw strength.
Supervisor roles differ: for dynamic you are a surface follower who can keep pace and provide timed intervals and physical support at the surface; for constant-weight you are a line-holder and a ready swimmer prepared to descend partway to meet your buddy and assist the ascent. Progress distance and depth in small steps, prioritising technique (equalisation, relaxed ascent, streamlined kicking) over chasing large increments.
Safety signals, emergency readiness and when to abort
Clear signals and rehearsed emergency steps make a rescue orderly instead of chaotic. Establish and rehearse a small set of signals before every session: a continuous whistle blast for general recall, short bursts to summon attention, a raised arm and pointed finger for “surface here,” and a firm two-hand grab or tapping to signal “need immediate help.”
Recognised signs to abort an attempt or the whole session:
- Sudden vision changes or tunnel vision.
- Uncontrolled muscle contractions, especially of the diaphragm or limbs.
- Pronounced disorientation, inability to follow simple commands, or loss of motor control.
- Deteriorating weather, increasing wind or boat traffic, or any equipment failure.
Supervisor readiness checklist:
- Maintain continuous visual contact with the performing diver; do not allow distractions like phones or long conversations.
- Be equipped to approach quickly: fins on (or immediately accessible), rescue float within reach, and a plan to remove weights safely.
- Have an agreed rescue plan that includes who removes fins, who stabilises airway, and where you hand care to emergency services.
Emergency planning should include: an on-shore contact who knows your plan, a stocked first-aid kit and flotation device, a means of communication with shore (mobile phone, VHF), and written contact details for local emergency medical services. For general guidance on dive safety practices consult recognised safety organisations such as Divers Alert Network (DAN). If any diver experiences concerning symptoms after a dive or rescue, see a doctor experienced in dive medicine.
Session pacing, progression and healthy training habits
Pacing matters more than raw volume. Quality of attempts beats quantity every time—allow full recovery between tries, and plan the session around those recoveries.
Practical session design tips:
- Set clear, measurable targets for each attempt: a small time increment, a fixed distance, or a technical goal (e.g., better streamline, earlier equalisation).
- Allow enough surface recovery breaths and rest—many problems arise from rushing attempts before full recovery.
- Keep progression conservative: increase depth or distance in small steps, and prioritize technique (equalisation, relaxed ascent, streamlined kicking) rather than raw numbers.
- Avoid peer pressure. Set the program relative to the least experienced buddy present: the group should never pressure someone into attempts they don’t accept.
If you train regularly, consider structured progression plans and professional coaching to target weak points safely. For tailored programs and structured supervision, manifreediver.ir courses can help you and your buddy team develop a safe, measurable plan.
Finishing the session: care, logging and learning
A session is not finished until gear is stored properly, the log is updated and the team has discussed what happened.
Equipment care:
- Rinse mask, snorkel, fins, suits and weights with fresh water. Even pool water needs rinsing because of chemicals.
- Dry gear away from direct sunlight. Long-bladed fins are especially vulnerable to warping if left in heat.
- Inspect the mask skirt, fin straps and weight releases for damage and make small repairs promptly.
Logging and personal analysis:
- Record discipline, times, depths or distances, breathe-up notes, sea conditions and any equipment issues.
- Note buddy performance and any incidents or near-misses; the small details are often what help you improve next time.
- Reflect on what went well, what could be improved, and set one or two objectives for the next session.
- Share findings with your buddy team so lessons are captured and safety is improved for future sessions.
When conducting a freediving session, the habits you build—planning, checking, communicating and reflecting—are what keep you safe and help your skill grow. Keep things conservative, keep your attention on your buddy, and build progress in measured steps. If anything during or after a session causes concern, seek professional medical evaluation from a clinician experienced in dive medicine.