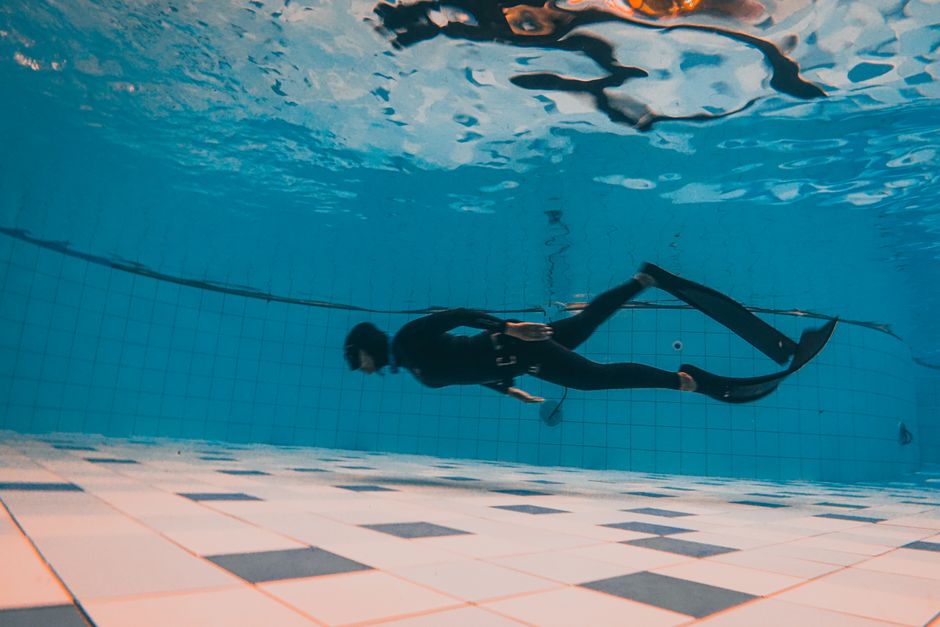
What constant weight freediving actually means
Constant weight freediving is the vertical, breath-hold discipline where you descend and return to the surface using the same bodyweight and without assistance from the line or changing ballast during the attempt. The diver follows a fixed guideline down and back up, and propulsion is provided solely by the diver's own muscles and the fins (or no fins) they choose to wear. The “constant weight” part simply means you don't jettison or add weight mid-dive; if you wear a weight belt or suit ballast, it stays the same for the whole run.
There are three common equipment styles within constant weight freediving, and each changes technique and priorities:
- Bi-fins — A fin on each foot. Bi-fins require a symmetrical flutter kick and tend to be easier to learn with. They reward efficient ankle flexibility and a long, deliberate kick cadence. Many recreational and early-stage competitive divers use bi-fins because they are forgiving and allow good control of descent speed.
- Monofin — A single blade for both feet. The monofin is the most hydrodynamically efficient option: when used with a dolphin-style undulation it produces more speed for a given energy cost. It requires good hip flexibility, core strength, and a coordinated whole-body motion. Monofin technique can change how you manage equalization and speed, because strokes tend to be fewer and more powerful.
- No-fins — Propulsion comes from modified breaststroke and body movement. No-fins is the most technically demanding; it emphasizes body awareness, streamlining and efficient use of arms and legs. Energy cost is higher than fin-assisted disciplines, so pacing and relaxation are critical.
How constant weight differs from other depth disciplines: the key constraints are that you must not pull on the line or change weights. Other depth disciplines may allow pulling the line, using the arms to assist ascent/descent, or altering ballast. In constant weight you accept the vertical challenge using only your chosen fin style and conserved oxygen stores, which makes pacing, equalization and efficient technique central to safe performance.
Basic physics and physiology you must understand
Two physical facts govern what happens as you go down: pressure increases and gas volumes shrink, and your body’s chemistry shifts as you hold your breath.
Pressure and gas volume: Water pressure increases by roughly 1 bar (atmospheric pressure) for every 10 meters of seawater. Boyle’s Law tells us that as absolute pressure goes up, the volume of gases goes down roughly inversely. Practically, your lung volume can halve within the first 10 meters. That affects buoyancy dramatically: you’ll typically be positively buoyant at the surface, pass through neutral buoyancy around some intermediate depth, and become negatively buoyant deeper down. You must be able to manage these buoyancy changes and avoid over-pulling on the line to control descent.
The urge to breathe and mammalian dive reflex: The sensation that forces you to surface—the urge to breathe—is primarily driven by rising carbon dioxide (CO2) in the blood, not by low oxygen. As CO2 accumulates it stimulates diaphragm contractions and the other sensations freedivers know. Counteracting that physiological drive relies on relaxation and the mammalian dive reflex: slowed heart rate, peripheral vasoconstriction and preferential blood flow to essential organs that conserve oxygen. Training helps strengthen tolerance to CO2 and efficiency of oxygen use, but it does not remove the need for prudent depth and recovery planning.
Why descent speed, lung packing and buoyancy matter: Descend too fast and you burn more oxygen fighting motion and equalizing; descend too slow and you increase total time under pressure and CO2 buildup. Lung packing (adding extra air at the surface before descent) increases oxygen load and can improve bottom time, but it also raises the risk of barotrauma and changes your buoyancy profile—so use it with experience and caution. Buoyancy affects how much leg effort you use: if you’re overweighted and negatively buoyant early, you’ll kick harder and use more oxygen; if you’re too light, you may waste energy fighting the surface on ascent. All these factors interact and influence the risk of shallow-water blackout, so learn them progressively and conservatively.
Essential equipment and dive-site setup
Your kit and the way you rig a dive site are simple but crucial safety and efficiency considerations.
Fins, mask and wetsuit
- Choose fins designed for freediving: long blades with an appropriate stiffness for your leg strength. Stiffer blades produce more thrust but tire smaller muscles faster; softer blades are easier for high-repetition training.
- Mask selection: low internal volume masks reduce equalization effort and are easier to clear on ascent. Fit is more important than style—prevent leaks and avoid masks that require big jaw tension to keep in place.
- Wetsuit: match thickness to water temperature and the duration of your session. Thin suits reduce buoyancy changes with depth; thicker suits provide warmth but change your surface buoyancy and weight needs. Consider one-piece suits for streamlined fit.
Dive line, surface buoy, bottom weight and lanyard
- Use a straight, well-marked line with depth markers at regular intervals. The line should hang taut from a surface buoy anchored by a bottom weight.
- A properly mounted lanyard connects you to the line and prevents drifting away or accidental overshoot. The lanyard also gives you a tactile reference on descent and a mechanical back-up to help the surface team locate you quickly.
- Confirm the surface recovery area is clear of boat traffic, swimmers and hazards before starting and set the line no deeper than your planned maximum depth.
When choosing a site, pick water that is only a few meters deeper than your target depth, calm enough for reliable surface monitoring, and with a clear rescue path. Confirm that your surface buoy is visible from a distance and that the dive line is free of entanglement hazards.
Descent and ascent technique for efficiency
Efficiency underwater is a product of relaxation, hydrodynamics and good equalization timing.
Streamline and body position
Keep arms overhead in a tight streamline, chin slightly tucked, and toes pointed. Reduce frontal area and avoid excessive head movement. Your goal is smooth flow past the body so each fin stroke produces maximum forward thrust.
Finning cadence
Adopt a relaxed, rhythmic cadence rather than frantic kicking. With bi-fins, think long, efficient strokes driven from hip rotation and with ankles relaxed; with a monofin, use a fluid undulation using the hips and core. Control the cadence for both descent and ascent—too fast wastes oxygen, too slow prolongs CO2 exposure.
Equalization
Equalize early and often. Small, frequent equalizations are less likely to cause pain or congestion than large, forceful attempts. If you feel resistance, stop descending, take a brief pause, re-evaluate your technique and equalize again. Practice the Frenzel and jaw-manipulation techniques out of water until they are reliable — then use them conservatively under pressure.
How to start the ascent
Common efficient starts to ascent include:
- Downward pull into glide: A controlled pull on the line to change trajectory, then tuck into a long glide and resume finning once you cross the neutral buoyancy depth.
- Continuous kick with gradual cadence change: Maintain a steady kick through the bottom portion and gradually increase cadence as positive buoyancy returns.
- Kick-pivot: A strong initial kick to begin ascending followed by a pivot into a streamlined glide when buoyancy starts to assist.
The aim is to minimise muscular work during the ascent when oxygen is scarcer, and to avoid sudden speed changes that could spike heart rate and oxygen consumption.
Breathe-up, relaxation and pre-dive routine
A calm and structured approach on the surface sets the tone for every dive.
Breathe-up
Use a controlled breathe-up: slow nasal inhalations and passive exhalations to normalize CO2 and fully oxygenate without hyperventilating. Hyperventilation reduces CO2 too much and removes the early warning that prevents loss of consciousness. A steady, measured series of 4–8 full breaths, followed by a short pause and gentle diaphragmatic contraction before the final inhale, is a practical pattern many divers use.
Mental and physical relaxation
Lowering heart rate before descent saves oxygen. Use light aerobic warm-up, progressive muscle relaxation, visualization of the dive, and slow nasal breathing. Keep your shoulders loose, jaw soft, and avoid adrenaline spikes—rapid surface movement or last-minute changes increase oxygen consumption before you even submerge.
Recovery breathing
After surfacing, first establish your airway above water and signal to your buddy. Use short, structured recovery breaths—controlled, rhythmic inhalations with passive exhalations—to restore oxygen and clear CO2. Keep upright or slightly leaning on the buoy until your breathing normalizes and you feel stable before attempting another dive.
Safety systems and buddy procedures
Safety is procedural as much as it is technical. Good habits and clear roles save lives.
Buddy roles and surface monitoring
- One person performs the dive while the other surface-monitors. The monitor watches the diver's surface behavior, the buoy and line, stays within easy reach and is ready to perform an in-water rescue.
- Apply the “one up / one down” rotation: one buddy is submerged (one down), and the other is surface-ready (one up). This keeps positions clear and responsibilities continuous during a session.
Lanyards and rescue protocols
Use a lanyard attached to the line to prevent overshooting depth and to provide a mechanical reference to the surface under loss of motor control. If a diver loses motor control or becomes unresponsive underwater, follow practiced rescue drills: bring them to the surface, ensure airway clear, support their head above water, and check breathing. If they are not breathing, begin rescue ventilations and emergency procedures immediately while summoning advanced help.
Shallow-water blackout prevention is essential: never dive alone, never hyperventilate, and respect limits. For safety guidance and recommended practices consult recognized safety authorities such as Divers Alert Network (DAN). If any unusual symptoms, persistent ear or sinus pain, neurological signs, or breathing problems occur after a dive, see a doctor experienced in dive medicine.
Local supervised training—such as practical rescue drills offered on Qeshm Island via manifreediver.ir—teaches these procedures in a controlled environment and is the best way to build competence and confidence.
Training progression and practical drills
Progress gradually. Combine pool work with structured open-water steps and record everything in a log.
Progression framework
- Pool dynamics and CO2 tolerance sets to build efficient finning and breath-hold comfort.
- Shallow open-water sessions for equalization practice and line familiarity at modest depths.
- Incremental depth increases—set a conservative target, repeat it until comfortable, then add small depth steps on subsequent sessions.
Practical drills
- Controlled depth increments: plan a target, descend, return and repeat with a fixed surface recovery time. Increase depth by a meter or two only after consistent comfortable performance.
- Equalization sets: practice frequent, small equalizations descending a line without a full dive—work on Frenzel mechanics and jaw mobility both in and out of water.
- Ascent pacing practice: have your buddy time and feedback your ascent speed; practice starting the ascent with a pull-glide and smooth cadence transitions.
- Cross-training: add ankle and hip flexibility work, core conditioning, and targeted kicking sessions to reduce cramps and improve propulsive economy.
Common problems and how to fix them
Here are common issues and practical fixes based on experience coaching divers.
- Overweighting: If you’re sinking too quickly or fighting to the surface on ascent, reduce belt weight in small increments. Test changes in shallow water; the correct setup lets you descend without frantic kicking and ascend with moderate, controlled strokes.
- Fast aggressive descents and poor streamlining: Slow the cadence, tuck into a tighter streamline and use fewer, longer strokes. Video yourself or get buddy feedback—small posture changes often yield large efficiency gains.
- Equalization failures: Descend more slowly, equalize earlier and more often, and practice Frenzel and jaw techniques out of water. If congestion is persistent, avoid diving until cleared and see a clinician if symptoms continue.
- Cramping or breath-hold fatigue: Improve conditioning and flexibility, review fin choice and technique, and ensure your warm-up and hydration are adequate. If cramps recur, reduce intensity and reassess training load.
Constant weight freediving is a technical, rewarding discipline that rewards careful planning, calm technique and steady progression. Treat safety procedures and rescue practice as core skills, not optional extras, and keep logs of your sessions so progress is deliberate. If anything feels off—persistent pain, neurological symptoms, or breathing difficulties—seek evaluation from a medical professional experienced in dive medicine.