Why exposure protection matters
There are two practical reasons to choose the right exposure protection for freediving: thermal insulation and environmental protection. Neoprene and dive skins keep a thin layer of water next to the skin that your body warms; that layer dramatically slows heat loss compared with bare skin. Remember that water conducts heat roughly 25 times faster than air, so even in pleasantly warm surface conditions you can lose heat over a long session. That slow cooling reduces comfort, robs you of energy, and can eventually impair judgment and performance.
Environmental protection is the second reason. Wetsuits, skins and rash guards protect against sunburn (important when you spend long surface intervals), scrapes from rocks or reefs, and minor stings from jellyfish or other organisms. A thin barrier reduces distracting discomfort — and in freediving, fewer distractions make it easier to equalize, relax, and maintain smooth breathing and movement. In short, good exposure protection is not only about warmth; it supports comfort, concentration and safety during every breath-hold.
Common freediving wetsuit configurations
Freedivers tend to choose garments based on flexibility, thermal needs and how much water exchange they accept.
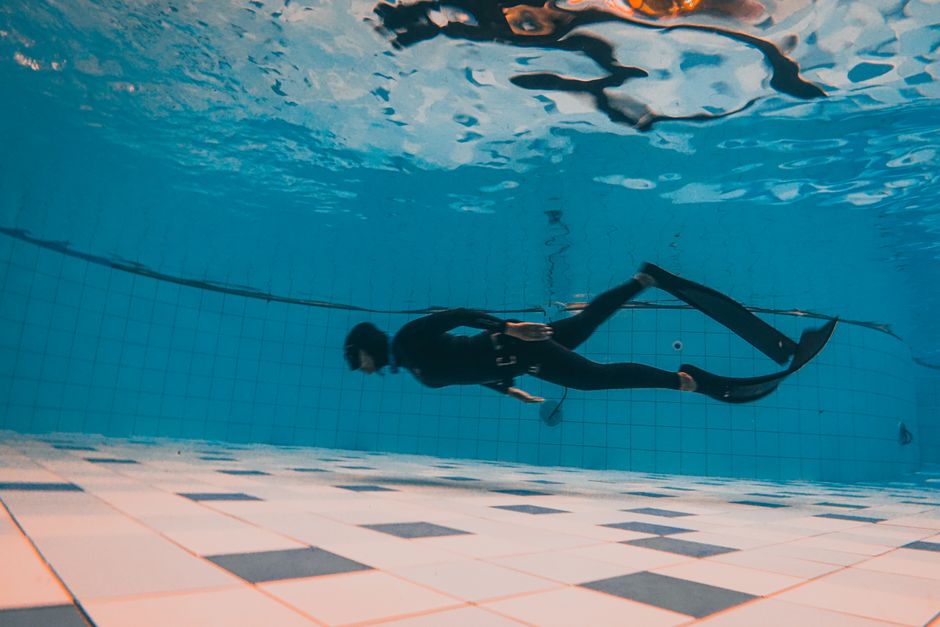
- Two-piece suits (pants + jacket with integrated hood): Favoured by many freedivers because they offer excellent freedom of movement and can form near-watertight seals where the jacket tucks into the pants. The built-in hood keeps the head warm without adding a zipper that could create a flush path for water. Two-piece systems are especially useful when you need a lot of torso warmth but want unrestricted leg kick and hip mobility.
- Single-piece suits (full-body with zipper): Easier to don and often used in warm-water diving or pool work. A zipper makes entry simpler but usually allows more water exchange and can reduce overall flexibility compared with comparable two-piece designs. Many freedivers accept that trade-off in tropical conditions or for short sessions.
- Rash guards and dive skins: Made of Lycra or thin synthetics, these give sun and jellyfish protection with almost no insulation. They’re appropriate for very warm water or surface-only training where thermal protection is not required but abrasion and UV protection are desirable.
Neoprene types and material trade-offs
Most wetsuits are neoprene, but how the neoprene is finished affects fit, flexibility, durability and ease of use.
- Unlined / open-cell neoprene: The inside surface is porous and slightly “sticky.” It hugs the skin, trapping a thinner, warmer layer of water and offering superior flexibility and reduced internal water movement. The downside: it’s slower and trickier to put on, it’s more delicate against abrasion and sunlight, and it usually requires a lubricant to don comfortably.
- Smooth-skin neoprene: A treated form of unlined neoprene with a slick outer finish. It retains much of the warmth and flexibility of open-cell material but dries faster and resists wind-chill at the surface. Smooth-skin still needs careful handling to avoid tears and UV degradation.
- Lined / closed-cell neoprene: This has fabric bonded to one or both faces of the neoprene. It’s easier to slide on, more durable, and resists abrasion and sunlight better than open-cell. The trade-off is slightly less stretch and somewhat more water exchange against the skin, which can reduce the absolute insulating efficiency for the same thickness.
Choosing materials is always a balancing act: maximum insulation and minimal internal water movement favour unlined or smooth-skin two-piece suits, while durability and ease of use favour lined, zipped single pieces or skins.
Fit, common fit problems and how to prevent them
A properly fitted wetsuit seals enough to trap that insulating film of water without being so tight that it restricts breathing or circulation. Fit issues commonly reduce comfort and can create equalization problems.
Common problems and simple corrections:
- Too loose: If water flushes easily in and out, you’ll feel cold and your equalization may become harder because you’re distracted and tense. Choose a thinner suit, a different cut, or a smaller size; for two-piece suits, ensure the jacket tucks properly into the pants and that the waist flap is fastened correctly.
- Too tight: A suit that pinches the chest, throat or groin will make relaxed breathing and diaphragmatic expansion difficult. Consider a different cut, or move up one size and compensate with a neoprene vest for core warmth.
- Hood squeeze: If the hood seals too tightly it can trap an air pocket around the ears and prevent pressure equalization. Prevent this by breaking the hood seal before descent (reach up between hood and head to let a little water in), trimming the hood’s face seal slightly, or choosing a different hood profile. If you feel a developing hood squeeze during descent, stop and let water replace the trapped air; never push through pain.
- Mask squeeze: Start any dive with the mask equalized and practice gentle, regular mask equalization during descent by exhaling a little air through the nose if you feel negative pressure building. If mask squeeze begins, stop the descent and exhale into the mask until pressure equalizes.
If you experience persistent pain, bleeding, hearing loss, or other concerning symptoms after a dive, seek a medical evaluation from a physician experienced in dive medicine. For general safety guidance about pressure-related injuries and emergency procedures, consult recognized dive-safety organizations such as Divers Alert Network (DAN).
Useful exposure accessories
Accessories let you fine-tune warmth, protection and comfort without changing the main suit.
- Vests (thin neoprene underlayer): Add core warmth without restricting limb movement. Useful in cooler water where you want to protect thoracic warmth but still keep leg mobility.
- Gloves and socks: Prevent chafing, protect against sun, and give modest thermal help. Choose the thinnest neoprene that keeps you comfortable; thicker gloves and socks compress with depth and can change fin fit and tactile ability.
- Lubricants: A small bottle of soapy water or a water-based donning gel makes open-cell suits far easier to put on between dives. Carry a towel for quick drying and adjustments.
- Small repairs and trimming tools: A patch kit, neoprene-safe glue, and a pair of rounded scissors for minor cuts to hoods or seals can save a session.
Buoyancy fundamentals for freedivers
Buoyancy in freediving is governed by three main factors: your body composition (fat is more buoyant than lean muscle), lung volume at any moment, and the buoyancy of your exposure protection. Neoprene contains tiny gas bubbles that make the suit positively buoyant at the surface; with increasing depth these bubbles compress and the suit’s buoyancy decreases.
Because neoprene and lungs change volume with pressure, buoyancy is depth-dependent: most divers are positively buoyant at the surface, approach neutral at middle depths, and may become slightly negative at deeper depth depending on suit thickness and lung volume. Your weighting strategy depends on what you want to do:
- Dynamic apnea / pool training: Aim for neutral buoyancy in a horizontal position so you can glide efficiently without constantly correcting your trim.
- Constant-weight depth dives: Typically you want to be slightly positive at the surface (for an easy recovery) and near-neutral at depth, so descent isn’t too difficult and ascent remains comfortably achievable.
Weight systems and distribution
Freedivers commonly use a few weight systems; the correct choice depends on discipline and personal preference.
- Elastic weight belt: A simple strap with lead blocks or a continuous rubber belt. Preferred for freediving because it stays snug even if the suit compresses and can be quickly released with one hand.
- Harness / vest systems: Place weights on the torso. They can improve comfort in very heavy weighting situations but are harder to ditch in an emergency and can shift your center of gravity.
- Neck weights: Small weights worn around the neck (with a quick-release) move the center of gravity forward, helping keep the body horizontal during dynamic swims.
Weight distribution is as important as total weight. Distribute weight evenly left/right and fore/aft so your body remains streamlined. An off-center load causes rotation, extra drag and wasted energy. All weight systems used in freediving must have a reliable quick-release that you can operate one-handed in the water.
How to choose weights and perform buoyancy checks
There are practical starting formulas to estimate required weight, but always test and adjust conservatively.
- Dynamic guideline (pool horizontal work): A rough starting point is to multiply wetsuit thickness (in millimetres) by two, then add 1–3 kg depending on body composition and gender. Start slightly under and add small increments during your checks.
- Constant-weight guideline (depth dives): A simpler rule is wetsuit thickness (in millimetres) plus 0–2 kg, aiming to be slightly positive at the surface with a full exhale.
Perform these buoyancy checks before you commit to a session:
- Glide test (dynamic): In pool or calm water, push off streamlined and glide for about ten seconds without kicking. You should not rise toward the surface or sink to the bottom. Adjust weight until you glide neutrally.
- Surface exhale test (constant-weight): Float vertically, take a normal breath, then exhale as if starting the dive. Wait a few seconds for any transient changes, then observe the waterline: it should be between your eyes and forehead. If you sink with an exhale, remove weight; if the waterline falls below the eyes you need more weight.
Always make adjustments in small steps and repeat the checks until the behavior is predictable and comfortable.
Pre-session gear checks, adjustments and care
Good habits before getting in the water prevent most problems. Use a buddy head-to-toe check and a brief run through equipment functions.
- Mask, snorkel and fins: Ensure the mask seal is clean and comfortable, the snorkel is secured without twisting, and fins sit correctly on the feet (adjust socks or straps as needed).
- Weight system: Verify the amount of weight, confirm quick-release operation, and check left/right balance.
- Accessories and safety gear: Confirm gloves, hood, and any lights or clips are secure and accessible.
After you enter the water, perform the appropriate buoyancy check rather than guessing. Adjust small amounts until you achieve the target behavior for your discipline. Between dives, a small bottle of lubricant and a towel make quick donning and minor adjustments much faster.
Care for your equipment to prolong its life: rinse wetsuits, masks and fins in fresh water after each session, dry suits out of direct sunlight, and store long-bladed fins flat to prevent warping. If you’re unsure about the right gear for your local conditions, work with a qualified instructor or one of the courses listed on manifreediver.ir to speed up correct selection and fitting.
Freediving exposure protection buoyancy are intertwined decisions: the suit you choose alters your buoyancy, the weights you need, and how relaxed you can stay in the water. Take a practical, testing-based approach: start conservatively, run the simple checks described here, and adjust according to how your body behaves in the water. For safety guidance about pressure injuries, decompression concerns or emergency response, consult a recognized organization such as Divers Alert Network (DAN), and seek a medical evaluation from a clinician experienced in dive medicine if you have persistent symptoms after a dive.