Why freediving rescues need their own approach
Freediving emergencies are not the same as surface‑only water incidents. The core difference is the breath‑hold element: oxygen and carbon dioxide are moving through a dynamic, compressed timeline. Hypoxia can progress much faster underwater than it appears on the surface, so the single most important early priority is returning the diver to the surface quickly and safely.
There are three practical consequences of this physiology that change how we rescue:
- Time to surface is critical. A diver who has lost consciousness or is struggling underwater needs to be brought up immediately — every second counts because the brain’s oxygen reserve is finite and depletes quickly during apnea.
- Airway and cervical care differ. Once the head is at the surface, the goal is a dry, supported airway. Aggressive handling — for example forcing a struggling person onto their back or manipulating their head repeatedly — can provoke coughing, aspiration, or even make a transient laryngospasm worse.
- Buddy procedures and communication must be tight. Simple, practiced rules like “one up, one down” supervision, firm buddy briefings before every session, and pre‑arranged hand or whistle signals greatly speed recognition and response. The quicker a buddy notices a problem, the shorter the interval the victim spends without a clear airway.
Recognising these differences and tailoring your rescue response to breath‑hold physiology reduces risk and prevents small incidents from becoming life‑threatening.
Recognising loss of motor control (LMC) versus blackout
When we teach and practice rescue skills, correct identification of what’s happening is foundational. LMC and blackout look different and they require different immediate actions.
Signs of loss of motor control (LMC)
- Uncontrolled arm or leg movement, twitching or irregular kicking.
- Frequent swallowing or coughing; a distressed attempt to clear the airway.
- Confused behaviour, difficulty following simple commands but still able to respond.
- Efforts to keep the face clear of water — the victim may be upright or semi‑upright and able to make purposeful movements.
Signs of blackout
- Sudden limpness with absence of purposeful movement.
- No breathing or only occasional gasps; the chest is still.
- Facial slackness — jaw dropped, mouth fixed open or slack.
- Unresponsive to voice or light touch.
Why correct identification matters: an LMC victim is usually conscious enough to be supported and coached through recovery breaths at the surface; handling them too aggressively can trigger panic or a blackout. A blackout victim is unconscious and cannot protect their airway — they must be recovered to the surface and have their airway managed immediately.
The R‑R‑R sequence: rescue, response, revive (overview)
The R‑R‑R framework — Rescue, Response, Revive — gives a simple, memorable structure to what can otherwise feel chaotic. Think of it as three overlapping phases with distinct objectives.
Rescue (first seconds)
Objective: get the person to the surface with control of the head and airway. If the incident happens at depth, descend quickly (as trained) and establish a secure hold. If it’s surface‑based, move in fast enough to take control before the victim submerges or inhales. Protect the airway as you bring them up — hand placement and lifting technique matter more than elaborate manoeuvres.
Response (surface checks)
Objective: determine level of consciousness and breathing. Once the face is out of the water, clear mask or mouth debris and perform a focused stimulation sequence for 10–15 seconds — commonly called the blow‑tap‑talk. This is intended to provide multiple sensory inputs to the respiratory centers and to elicit coughing, gagging, or a breath if the airway is not fully closed.
Revive (if necessary)
Objective: re‑establish effective breathing. If the victim does not resume spontaneous breathing after response efforts, provide rescue breaths to break a laryngospasm and then continue supporting ventilation while arranging for advanced care. If breathing still does not restart, escalate to continuous ventilations and urgent transfer ashore or to emergency medical services.
Throughout R‑R‑R, the rescuer must remain calm, keep communication clear, and use the simplest effective interventions. Practice the sequence until your responses are automatic.
Practical rescue techniques by discipline
Different training environments require slightly different approaches. Below are clear, discipline‑specific techniques that emphasize airway protection and rapid recovery.
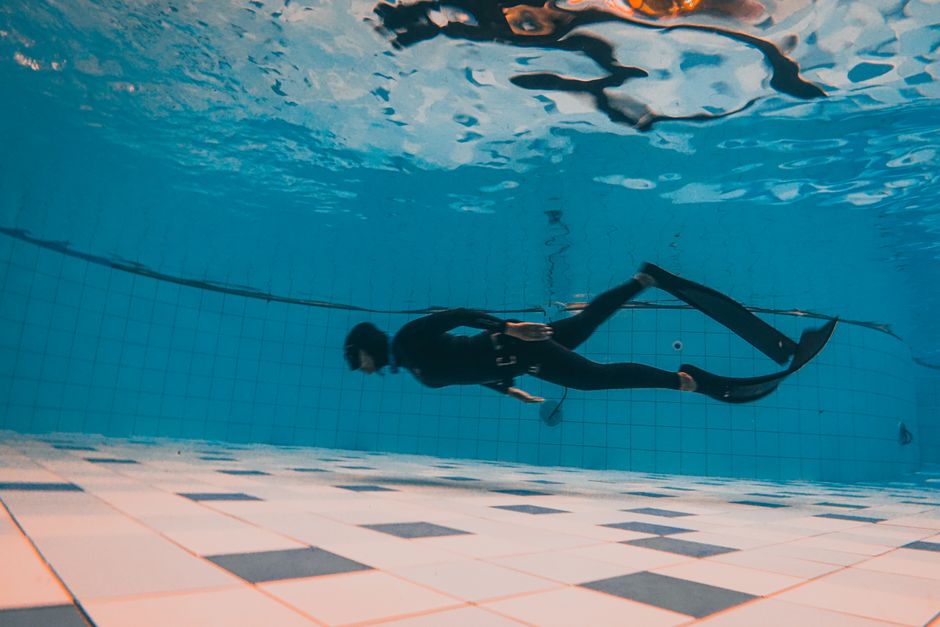
Static / pool rescue
- Stabilise at the pool edge: stand in a stable stance and use the edge for purchase. If the victim is floating near the edge, use one arm to control their shoulders while supporting the back of the head.
- Roll face‑up gently: place hands under the victim’s shoulders and roll them so the face clears the water; avoid forcing the head back. Keep the airway above the surface and remove the mask if it interferes with breathing.
- Talk and support: many LMC cases recover quickly with verbal guidance and gentle face‑support — allow the person to complete recovery breaths while you keep them afloat.
Dynamic / patrolled pool
- Approach from behind to avoid exposing your body to the victim’s unpredictable movements.
- Establish shoulder control and be ready to disengage or remove any neck weight or tether that reduces buoyancy.
- If the victim is panicking, use one arm to support the chest and the other on the jaw/chin to keep the airway clear while you guide them to the pool edge.
Open‑water / deep rescue
- Use the dive line and lanyard as visual and tactile references to locate and ascend with the victim. Staying close to the line reduces disorientation and loss of reference during ascent.
- Hand placement: one hand under the chin, the other under the neck/upper forearm to lift the head and maintain airway as you ascend. Keep the victim’s head slightly elevated (chin lift) as you approach the surface.
- Ascend strongly but smoothly, keeping the victim higher than you until the face breaks the surface. Move toward a buoy or boat for support; once supported, roll them onto their back and begin response procedures.
Across all disciplines, practise these manoeuvres gradually and under supervision before attempting them in a real emergency.
Airway management and revive steps that work
Airway stimulation and controlled ventilation are the core tools for reviving a blackout or severe LMC victim.
Blow‑tap‑talk
This is a short, rhythmic sequence applied for about 10–15 seconds:
- Blow — a short, directed puff of air across the victim’s face and nostrils. This can trigger a breathing reflex and reassure the brain that air is available.
- Tap — light, firm taps to the cheek or shoulder to provide somatosensory input and wakefulness cues.
- Talk — use the victim’s name and clear verbal prompts: “Breathe, breathe, come on.”
Blow‑tap‑talk supplies combined sensory input that often terminates a laryngospasm or stimulates a coughing/breathing response in shallow recoveries.
Rescue breaths
If blow‑tap‑talk fails and the victim remains apnoeic, deliver an initial short, firm rescue breath aimed at opening the larynx. The intent is twofold: provide oxygen and, where laryngospasm is present, create positive airway pressure to help the vocal cords relax.
Technique notes:
- Use a two‑hand jaw support and chin lift to open the airway if you can safely manipulate the head.
- Deliver a single, short breath rather than prolonged insufflation; re‑assess for chest rise and any coughing. If there is chest rise, continue with a paced series of ventilations while arranging urgent transport.
- If you are trained and a barrier device is available, use it. If not, perform mouth‑to‑mouth with a seal and continue until spontaneous breathing returns or emergency services take over.
When to escalate
If spontaneous breathing does not resume quickly after repeated interventions, escalate immediately:
- Begin continuous ventilations (and chest compressions if there is no pulse) according to your CPR training.
- Signal for emergency medical services and organise rapid transfer to shore or a boat with a clear plan for handover.
- Consider that an underlying medical issue may be present; follow the guidance of recognised safety organisations such as Divers Alert Network (DAN) when arranging evacuation and medical assessment.
If symptoms persist after initial recovery, or if there are neurological deficits, see a doctor experienced in dive medicine for evaluation.
Preventing incidents through session management
Rescue preparedness begins before the first breath‑hold. Proactive session management reduces the probability of LMC and blackout incidents.
No hyperventilation and conservative breathe‑ups
Never teach or permit pre‑dive hyperventilation. Hyperventilating reduces carbon dioxide without significantly increasing oxygen stores and delays the urge to breathe — this is a common cause of shallow water blackouts. Encourage slow, controlled breathe‑ups and conservative increases in depth or time.
Clear buddy roles and briefings
- Assign a surface supervisor (one up) and an in‑water spotter (one down) before each session.
- Agree on hand signals, emergency calls, depth/time limits and the recovery plan.
- Decide beforehand who retrieves the line or buoy and who will manage medical communication if needed.
Equipment and site controls
Use well‑marked dive lines, a functional lanyard for constant weight dives, and select sites only a few metres deeper than the session target. Restricting maximum depth to just beyond your intended limit reduces the risk of inadvertent over‑depth exposure and gives buddies confidence when performing rescues.
Safe practice: drills, debriefs and mental readiness
Skill and confidence come from repetition in a controlled environment, not from improvisation in emergencies.
Regular realistic drills
Schedule frequent, realistic practice sessions for LMC and blackout rescues in shallow, controlled water under an experienced instructor’s supervision. Rotate roles so everyone experiences being surface supervisor, in‑water buddy and the performing diver. Practice the R‑R‑R sequence, hand placements, lineup retrieval and the blow‑tap‑talk sequence until these responses are fluid.
Manage panicked victims carefully
A panicked person can injure themselves or their rescuers. Stabilise first: approach from behind if possible, use one arm to support the chest and keep your other hand ready to protect the head. Speak calmly; give simple instructions. Avoid forceful repositioning or wrestling the victim — this increases risk of aspiration or provoking a blackout.
Debrief and continuous learning
After any incident or drill, debrief with the team. Discuss what went well, what was unclear, and update your briefings and procedures accordingly. Rescue timing, communication clarity, and equipment handling improve with honest, structured reviews.
For organised, progressive training in rescue scenarios and structured practice, consider the courses and supervised sessions offered at manifreediver.ir.
Remember: timely recognition, calm action, and consistent practice are the things that save lives in breath‑hold diving. Keep your skills fresh, brief your buddies, respect the limits of the group, and when in doubt call for help. For authoritative safety guidance and resources, consult organisations such as Divers Alert Network (DAN), and seek medical evaluation from a clinician experienced in dive medicine whenever recovery is incomplete or symptoms persist.