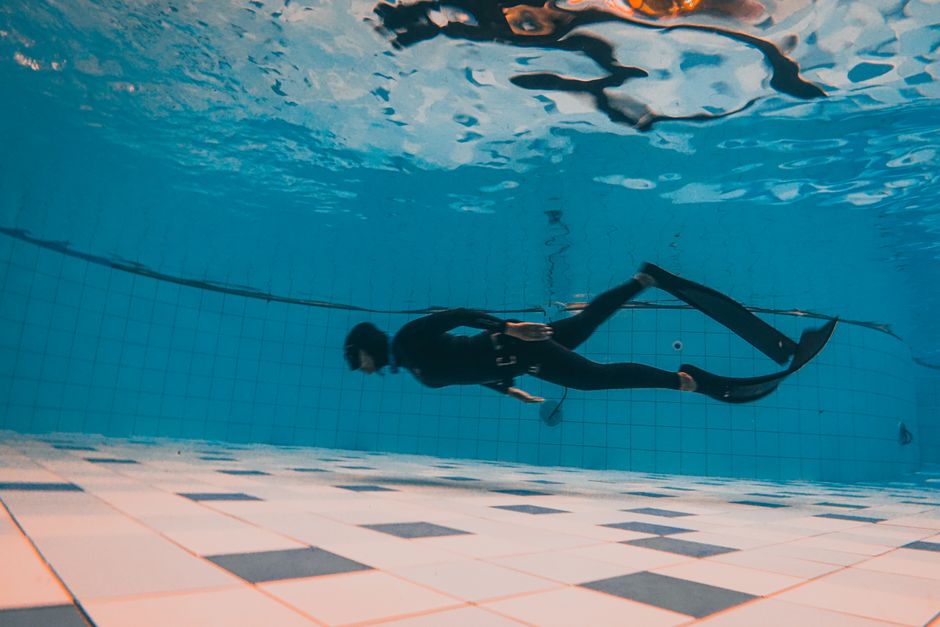
Why a safety-first progression matters
Freediving is an elegant mixture of physiology, technique, equipment and the quiet accumulation of experience. Progression is not just about going deeper or holding your breath longer — it is about bringing those four elements together in a controlled, repeatable way. When any single piece is neglected, risk rises: poor equalization technique invites ear and sinus barotrauma, insufficient surface recovery increases blackout risk, and unfamiliar or poorly maintained equipment can fail at the worst moment.
There are practical reasons to keep progression conservative. Gradual targets reduce the pressure-related stresses on your ears, sinuses and lungs, giving your body time to adapt and your equalization to develop. Smaller, steady increases are also easier to troubleshoot. If you notice a new equalization difficulty at 10 metres, it is far preferable to address it there rather than discovering the same problem at 20 or 30 metres where consequences can be more serious.
Skills are perishable. The breathing routines, rescue responses, quick‑release handling and recovery breathing that protect you at depth require regular practice to remain reliable. Repetition builds pattern recognition: you begin to notice early signs of a poor breathe‑up, a drift in technique or a creeping nervousness that will degrade your performance. Without repetition, the speed and accuracy of those critical responses decline — and in freediving, fast, correct reactions can make the difference between a minor incident and an emergency.
When we talk about freediving safety progression, we are describing a mindset as much as a plan: conservative goals, deliberate practice, robust equipment checks and honest debriefing after each session. If you want a single principle to carry forward, let it be this: improve one thing at a time, and only after that thing is consistently comfortable.
The freediving lanyard: parts, purpose and proper use
The lanyard is one of the simplest but most critical safety tools for open‑water constant‑weight dives. It links you to the descent line so you don’t lose orientation, and it gives your buddy something secure to hold or haul on if you lose motor control or consciousness. Treat the lanyard as part of your personal safety system, not just an accessory.
A typical freediving lanyard has five main components, each with a clear role:
- Wrist strap — fits snugly around the wrist and must be correctly sized so it cannot slip off unintentionally yet can be released when needed.
- Swivel — prevents the line from twisting as you spin or roll, keeping the cable functional and reducing tangles.
- Rigid cable — often stainless steel or otherwise semi‑rigid to resist snagging and to allow the buddy to pull the diver along the line if necessary.
- Carabiner — the connector between the cable and the dive line. It must be robust, smooth, and compatible with the line size you are using.
- Quick‑release — allows the diver to disconnect rapidly if the situation calls for it (e.g., entanglement near the bottom, getting trapped on an obstacle).
Safe use means more than attaching the lanyard. Always fit the wrist strap deliberately: tighten it so it will not slide over your hand, and tuck any loose tails so they cannot snag. Before water entry, check the swivel functions smoothly and that the quick‑release opens and closes reliably. Do these checks on land and again on the surface before every dive.
Practice using the quick‑release under supervision in controlled conditions until it becomes an automatic, calm movement. Practice releasing one‑handed and practice having a buddy re‑attach you — both actions must be comfortable for the person wearing the lanyard and for the supervising partner.
Dive line, buoy and surface setup for safe sessions
A clear, well‑set dive line and surface system reduce confusion and speed rescue actions if anything goes wrong. The line depth should be set to the planned limit or slightly shallower; do not set it deeper than your target depth. This avoids accidental overreach and makes the plan explicit.
Organize the surface area so the descent and exit points are unambiguous. Keep the immediate area around the buoy clear of swimmers, anchors or boat traffic. If there is surface movement, rig the buoy and line so they remain vertical and visible despite swell.
Supervision is an active task. The supervising buddy should keep their face in the water, maintaining visual contact with the diver during descent and ascent, and keeping the line slightly taut. That tension gives immediate feedback about movement on the line and shortens the response time if the diver signals or is not moving.
Before any dive, agree on the planned depth and mark it on the line with a visible tag or knot. Confirm hand signals and pull signals: a gentle pull might mean “come up slowly,” while a continuous strong pull means “surface now.” Make sure everyone understands who will descend to meet the performer and at what time; coordination prevents the common problem of delayed buddy descent or arriving too early.
Using a dive computer to increase safety
A freediving watch or wrist computer gives immediate, objective information that improves decision making. Rather than guessing depth or time, you can see an accurate readout of current depth, dive time and maximum depth at a glance. That information helps both the performing diver and the supervisor to judge whether to continue, abort, or lengthen the recovery interval.
Useful computer features for progression and safety include:
- Settable depth and time alarms so you get a clear audio or visual cue when a planned limit is reached.
- A surface‑interval tracker to remind you how long you’ve been recovering — use it to enforce conservative recovery times rather than guessing.
- Stopwatch and dive history functions to coordinate buddy descents and to review objective data during your debrief.
Use audible or vibration alarms that can penetrate your exposure protection and the ambient noise. Configure the alarms before the session so they match your agreed‑upon limits. After the dive, review the computer log with your buddy: consistent deviations from planned depths or unexpectedly short surface times point to a need to reduce targets or revise procedures.
Logbooks: the simple tool for safer progression
A logbook is one of the most under‑used safety tools in freediving. Recording the basic facts of each session creates a longitudinal picture of your development, the conditions that work best for you, and the red flags that keep recurring.
Include these items in every entry:
- Date, site and water type
- Conditions (temperature, visibility, currents, waves)
- Equipment used and weight configuration
- Warm‑up sequence, number of dives, max depth/time and surface intervals
- Subjective notes: UTB sensations, equalization issues, feelings of fatigue or light‑headedness
With a logbook you can plan incremental targets based on objective trends rather than emotion. If your entries show consistent trouble with equalization when you increase depth by more than 2 metres, use that pattern to set smaller increments. Digital logs that import directly from a dive computer save time and preserve objective data for later review with a coach or instructor.
Buoyancy, weights and pre‑dive checks
Buoyancy management is foundational to safe freediving. The aim is to be slightly positively buoyant at the surface, and neutral at your target depth. That way you can control descent and return to the surface without excessive effort.
Perform a buoyancy check before every dive: float vertically, exhale fully and observe whether you sink or float. Adjust weight until you are neutral at the intended depth — too much weight will make the ascent unnecessarily strenuous, while too little weight makes the descent difficult and increases equalization effort.
Adopt a head‑to‑toe buddy check before entering the water. Verify mask fit, fins, snorkel, weight system and that the quick‑release is accessible and functional. Confirm that your buddy knows your planned depth and has sight lines unobstructed so they can supervise effectively.
A useful rule of thumb: your descent should feel controlled and relaxed. If you find yourself having to kick hard to get down, you probably have too little weight, and if you must fight to get up, you have too much. Make small adjustments and re‑check.
Buddy procedures and session flow
Good sessions follow a simple rhythm: agree, check, perform, recover, review. Roles rotate so each diver alternates being the performer and the supervisor. The supervisor’s job is focused — timekeeping, visual monitoring, prompting during surfacing and being prepared to physically assist on recovery.
Agree on the entry method, surface swims and emergency procedures before getting into the water. During surface swims keep close proximity so you can communicate easily and prevent separation. When it is time to switch roles, only do so after the performing diver has completed a full recovery and you have completed your checklist: breathing normal, colour normal, no dizziness, logbook noted.
Supervisors should remain attentive: keep your face in the water to watch the diver’s descent and signal immediately if anything looks off. If you need to descend to meet the performer, use a controlled duck dive down the line and plan your return so both divers swim up together. Practise rescue tows and recovery breathing on land and in calm water so they become calm, smooth actions under pressure.
A practical progression plan for safer improvement
Progress faster by being conservative. Increase depth or time in small, planned steps — a common and safe approach is to add small increments between attempts rather than large jumps. Focus first on technique: early and frequent equalization, relaxed finning, a streamlined body position and controlled breathing up to the final breath. These elements are more important than raw depth.
Work on controlling the urge to breathe (UTB) through consistent, relaxed warm‑ups and recovery practice; improving your UTB response is a better investment than chasing one deeper dive. When you start moving into deeper water or more complex environments, do so with guided, supervised sessions. If you dive from Qeshm Island or nearby areas, structured local sessions with experienced coaches at manifreediver.ir can help you make those transitions deliberately and safely.
Finally, let data guide you. Use your logbook and dive computer to spot trends. If your bottom times are decreasing or you feel more fatigue after a certain day, step back and reassess — recovery and adaptation are part of progression just as much as adding metres or seconds.
Equipment care and end‑of‑day routines
Good gear care keeps equipment reliable. Rinse all equipment in fresh water after each session, including fins, mask, snorkel, weight belts and lanyards. Dry everything out of direct sun and inspect straps, seals and quick‑releases for wear. Store long fins flat to avoid warping and replace any part that shows cracks, corrosion or compromised function.
Finish each day with a short buddy debrief and a logbook entry summarising what went well and what to improve. The conversation is as valuable as the written record: honest feedback from your buddy helps you correct small errors before they become habits.
Safety reminders: if you experience persistent ear pain, dizziness, breathing difficulties, vision changes, prolonged confusion or other concerning symptoms after a dive, seek professional medical evaluation from a physician experienced in dive medicine. For general dive‑safety guidance and resources, organizations such as Divers Alert Network (DAN) offer practical advice and referral information.
Freediving safety progression is a patient, steady path. Treat each session as a lesson, keep your goals modest and specific, and lean on good equipment, conscious buddying and honest logging. The sea rewards preparation and respect; with a safety‑first approach you will enjoy more dives, clearer progress and fewer surprises.